📡 How to Trigger a Webhook from Promptomatic to Automation Platforms (Make.com Example)
This guide shows you how to connect your AI form from Promptomaticforms.com to automation platforms using a webhook. While you can use any webhook-compatible platform like Zapier, Integromat, or n8n, this guide demonstrates the process using Make.com. This allows you to automatically send captured email leads and form data to any third-party tool — like your email inbox, Google Sheets, or CRM.
🔧 Part 1: Set Up a Webhook in Make.com
1. Create a New Scenario
- Log in to Make.com
- Go to the Scenarios tab
- Click “Create a new scenario”

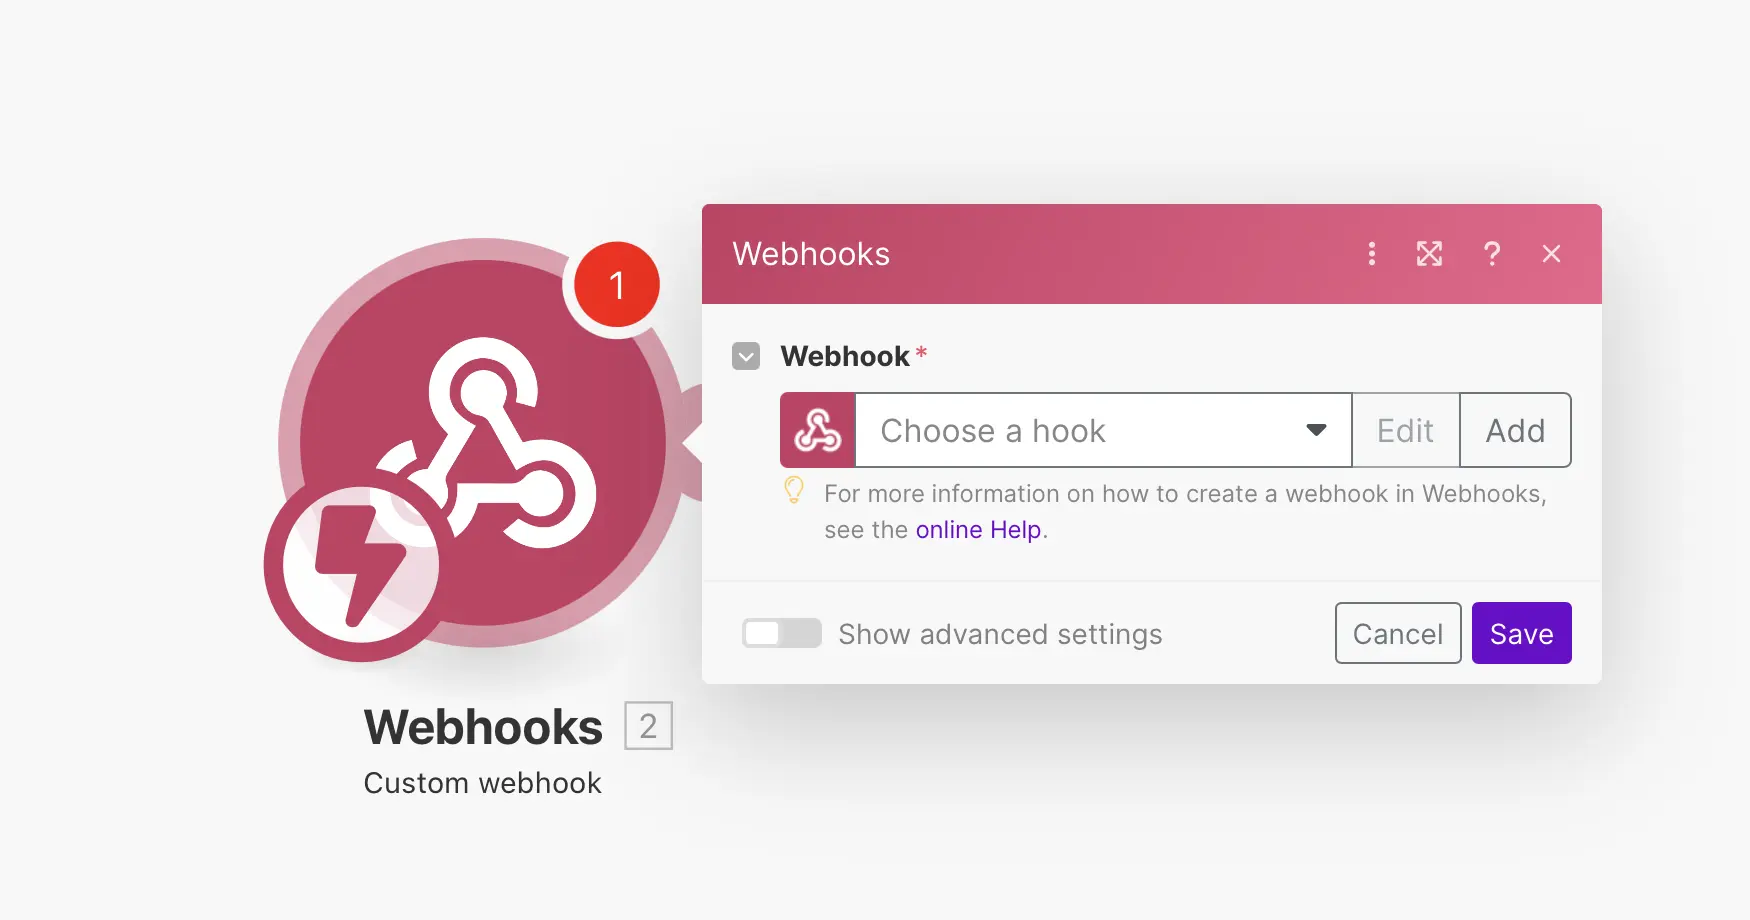
2. Add the Webhook Module
- Search for “Webhooks”
- Choose “Custom Webhook”
3. Create Your Webhook
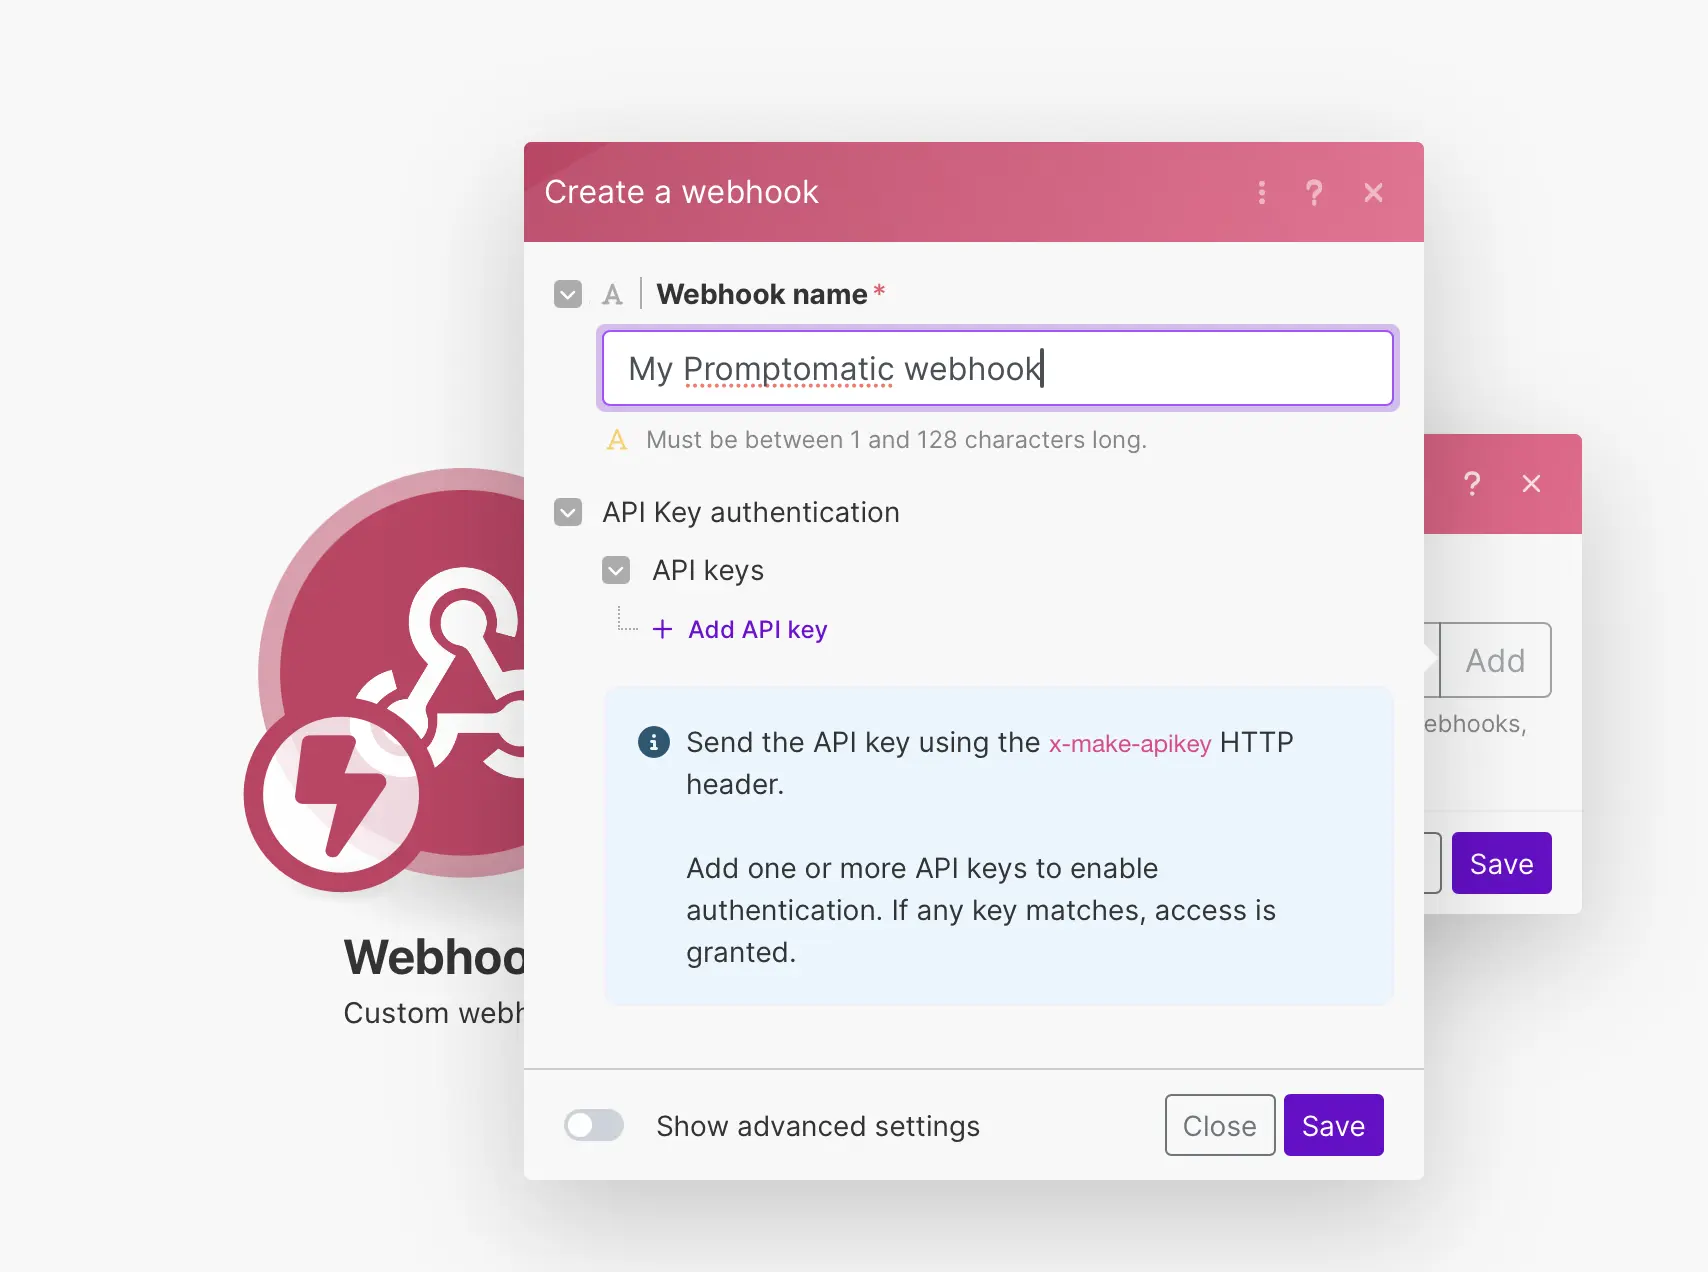
- Click “Add” to create a new webhook
- Name your webhook (e.g.,
My Promptomatic Webhook) - Optionally, enable API Key authentication for extra security
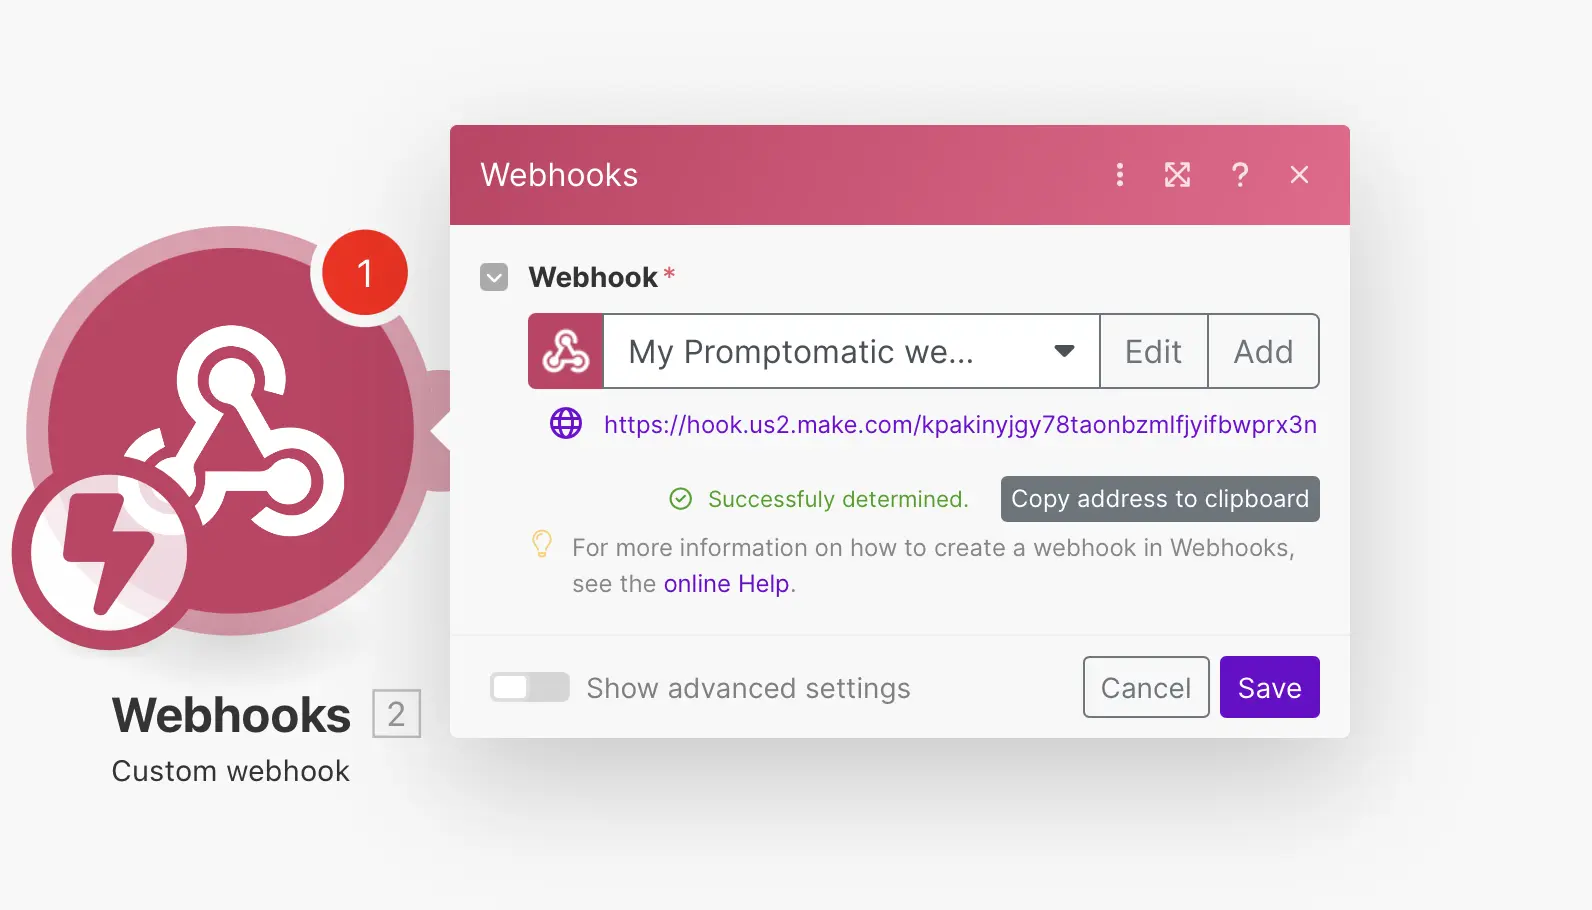
4. Copy Your Webhook URL
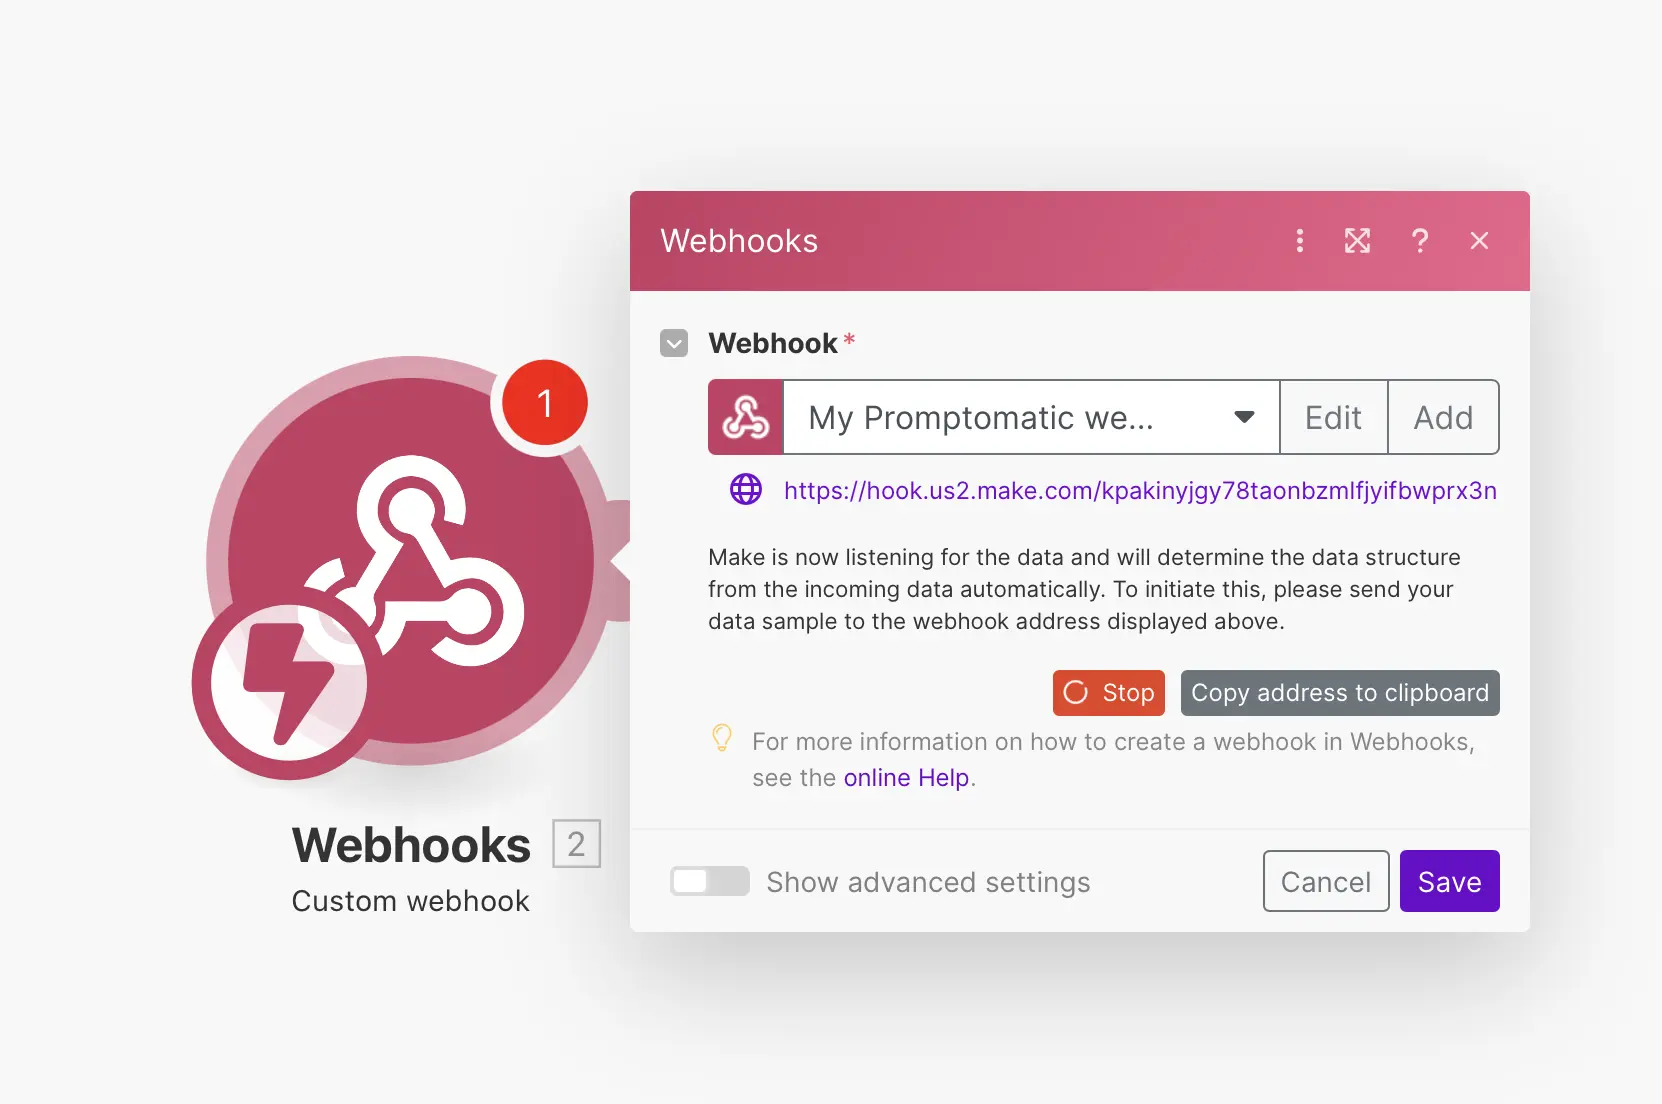
Make.com will generate a unique webhook URL.
Copy it — you’ll paste this into Promptomatic in the next step.
Once you trigger this webhook once, Make will automatically detect the payload structure.
5. Trigger the Webhook (Once)
Once triggered, you’ll see:
✅ “Successfully determined.”
This means Make is ready to use your form data in the next module.
6. Add a Module (e.g., Email)
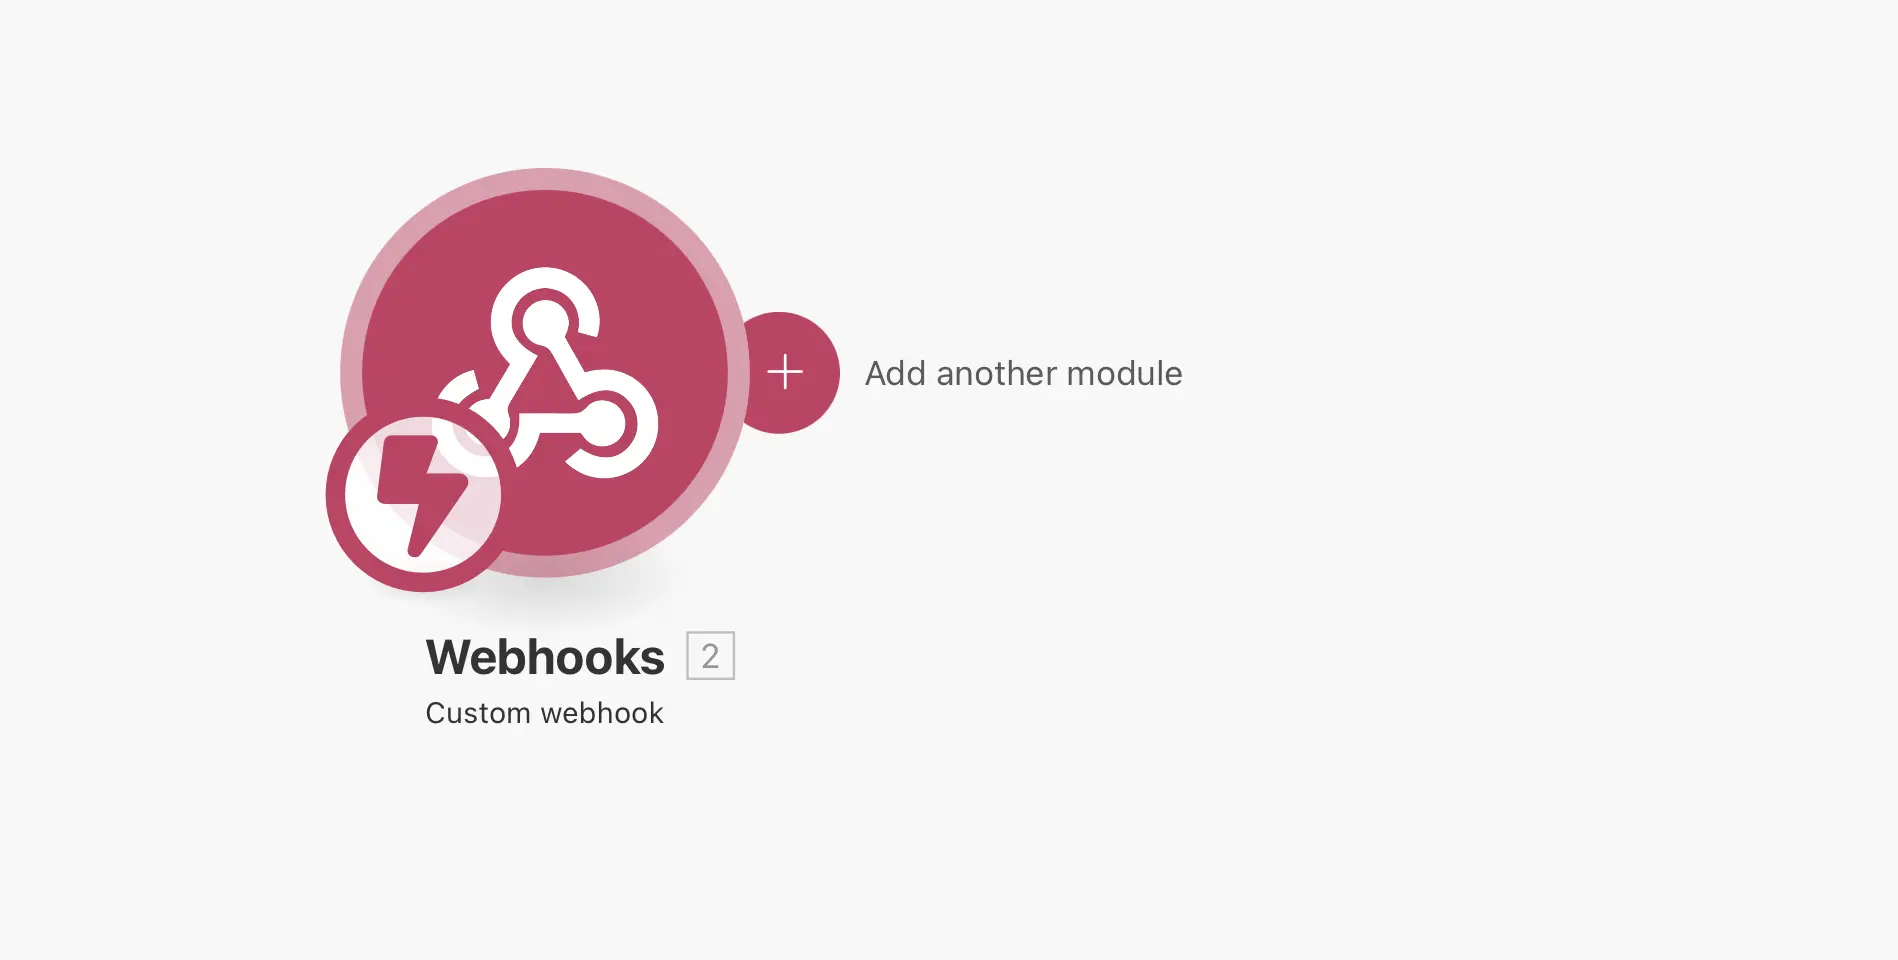
Click the ➕ Add another module button next to the webhook to continue your scenario. Choose what should happen next — like sending an email.
7. Choose “Send an Email”
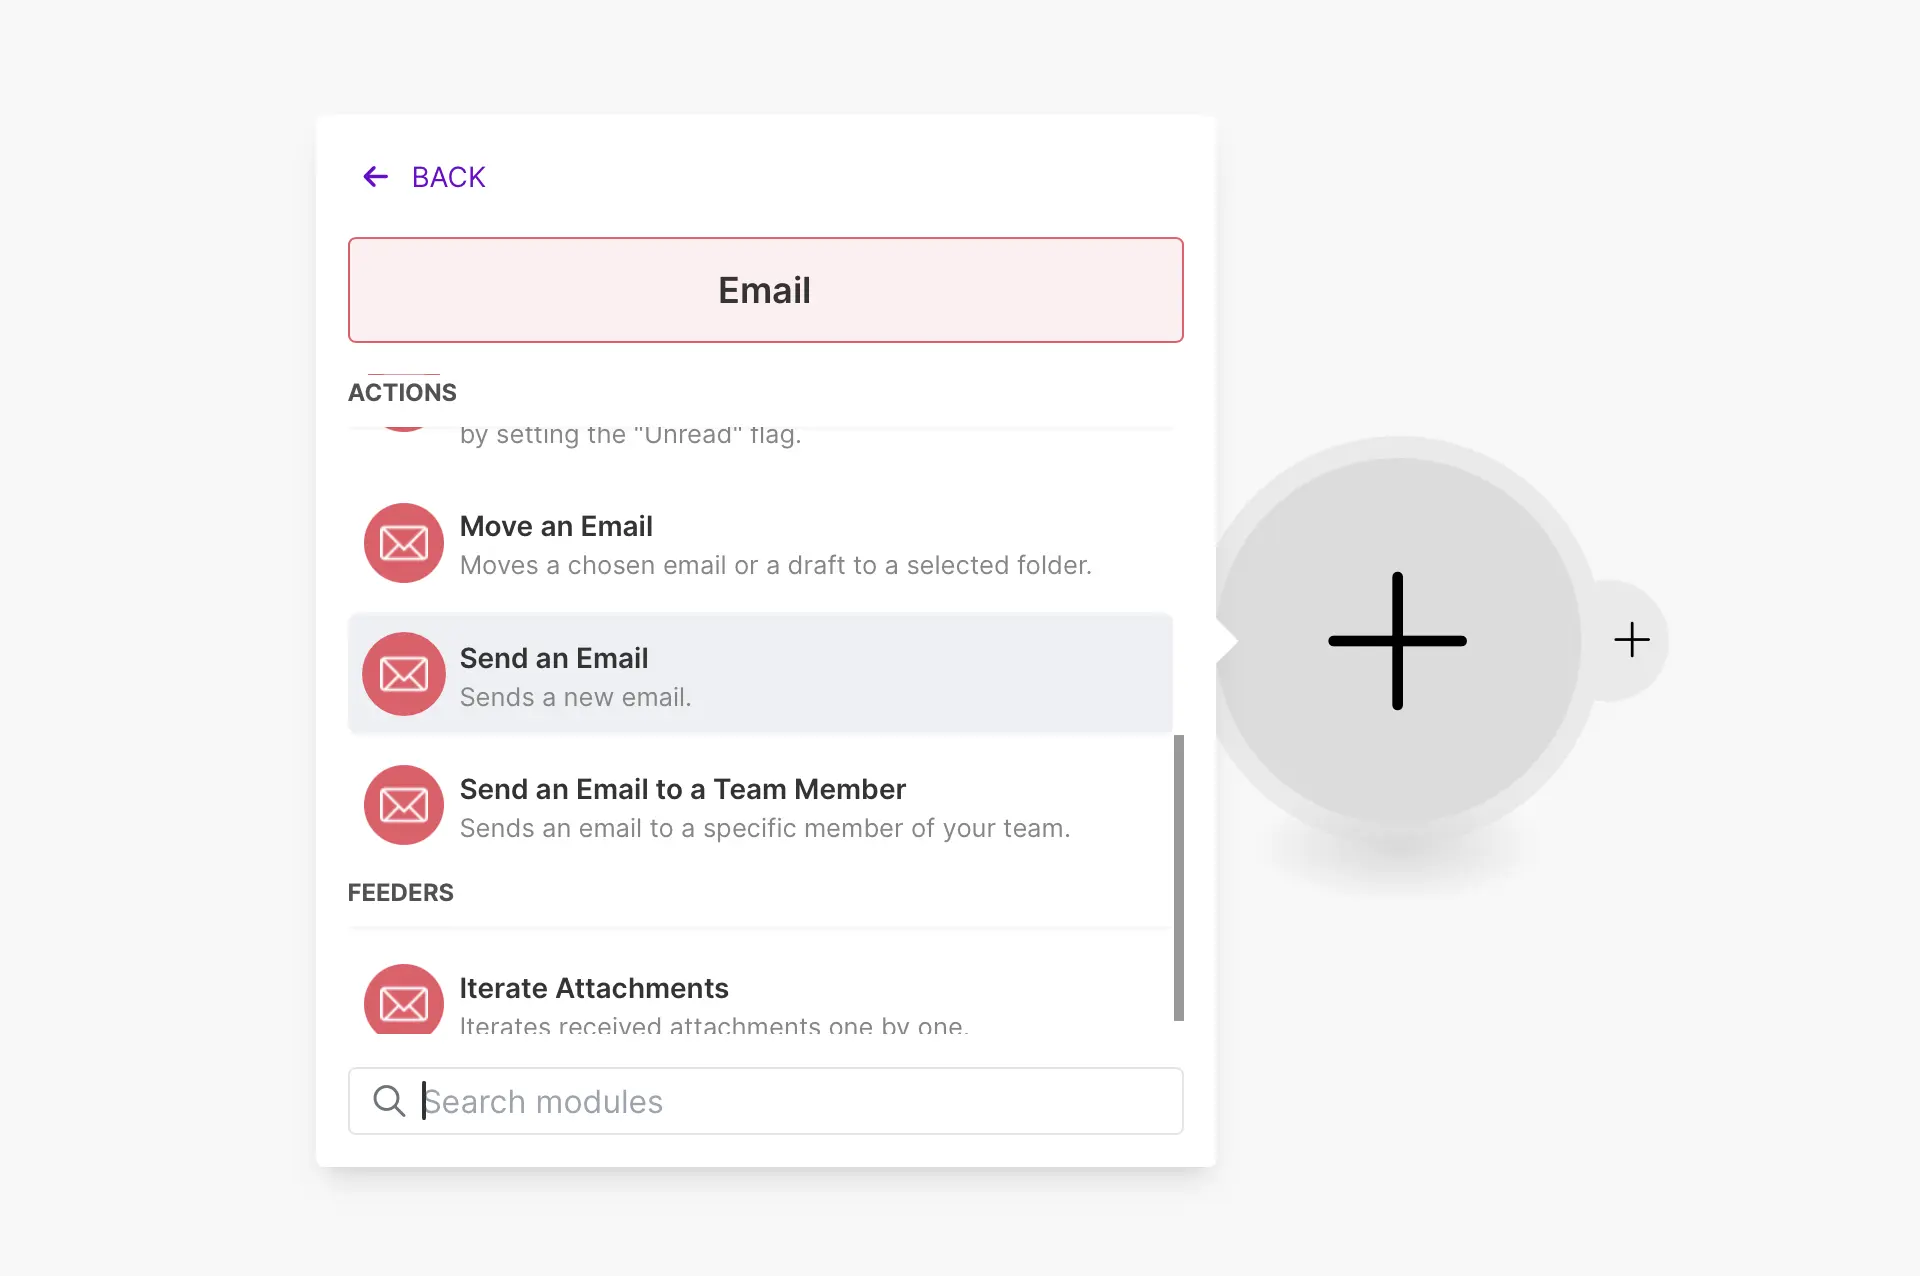
- Choose Email → Send an Email
- Works with SMTP, Gmail, or Outlook
8. Configure the Email Module
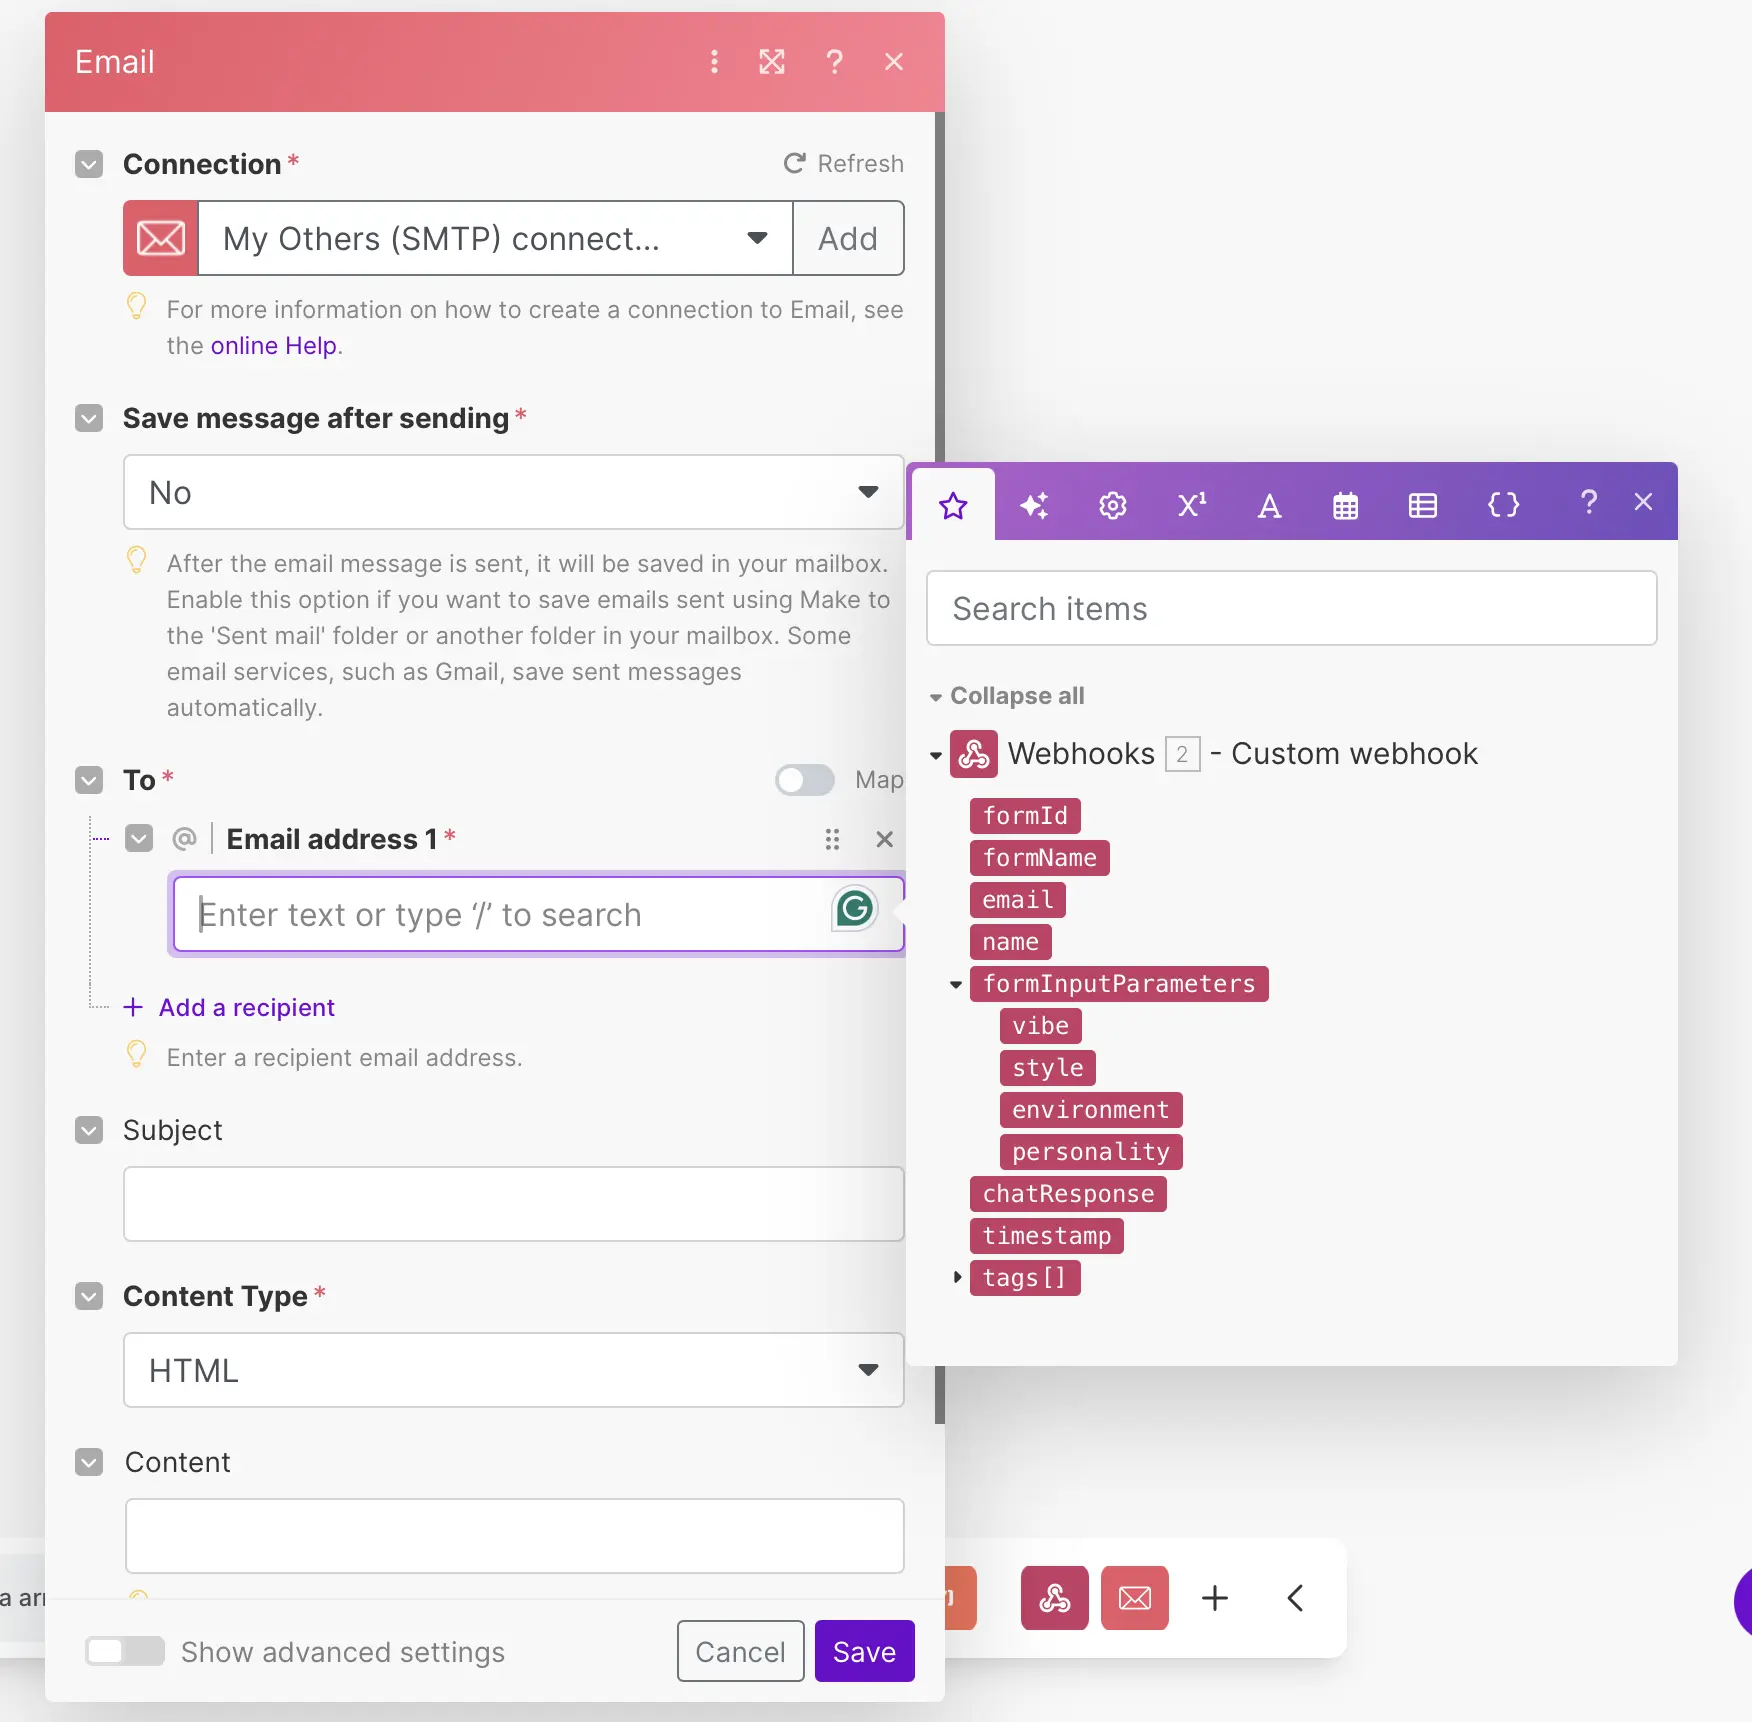
- Select your email connection (e.g., SMTP)
- Use variables from the webhook (e.g.,
email,name,chatResponse) - Set Content Type to HTML (recommended)
Example configuration:
To: {{email}}
Subject: Hello {{name}}
Body: This is your AI result: {{chatResponse}}
9. Save and Run the Scenario
- Click the Save icon at the bottom of your scenario screen
- Optionally, enable “Immediately as data arrives” so the webhook triggers automatically
- Use Run Once to test your setup if needed

🔁 Part 2: Connect the Webhook to Your Promptomatic Form
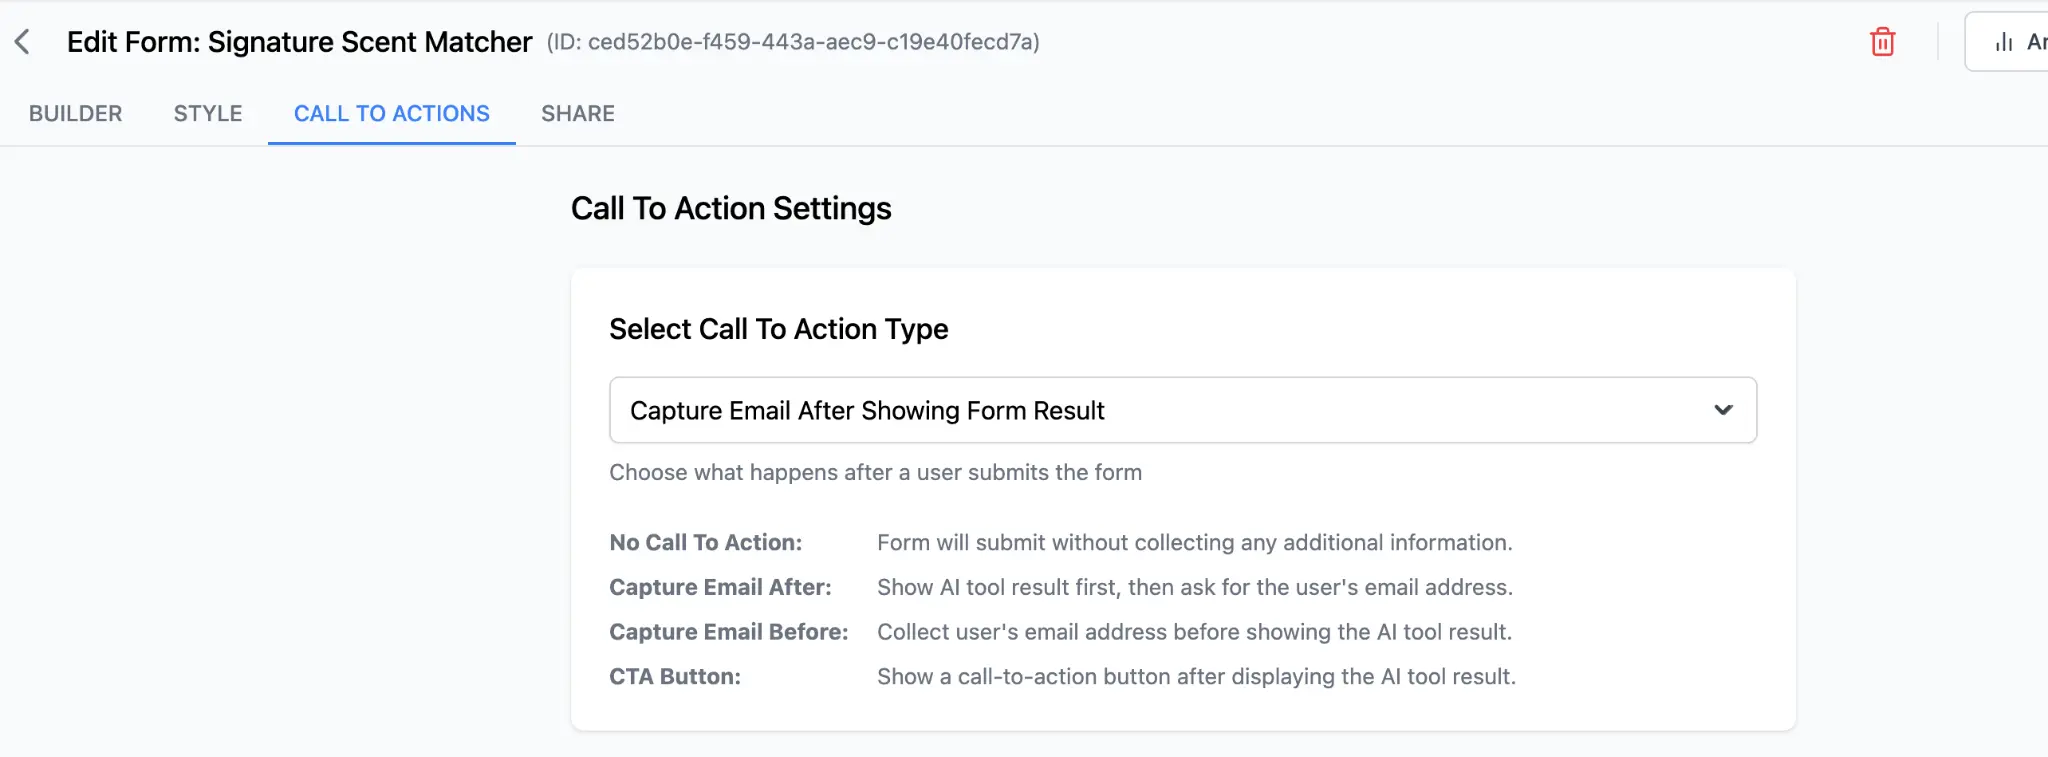
1. Choose a Call to Action Type
In your form editor on Promptomaticforms.com:
- Navigate to the Call to Actions tab
- Choose a CTA type that collects email:
- Capture Email After Showing Form Result
- Capture Email Before Showing Form Result
This step is required for webhook integration to work.
2. Add Webhook Configuration
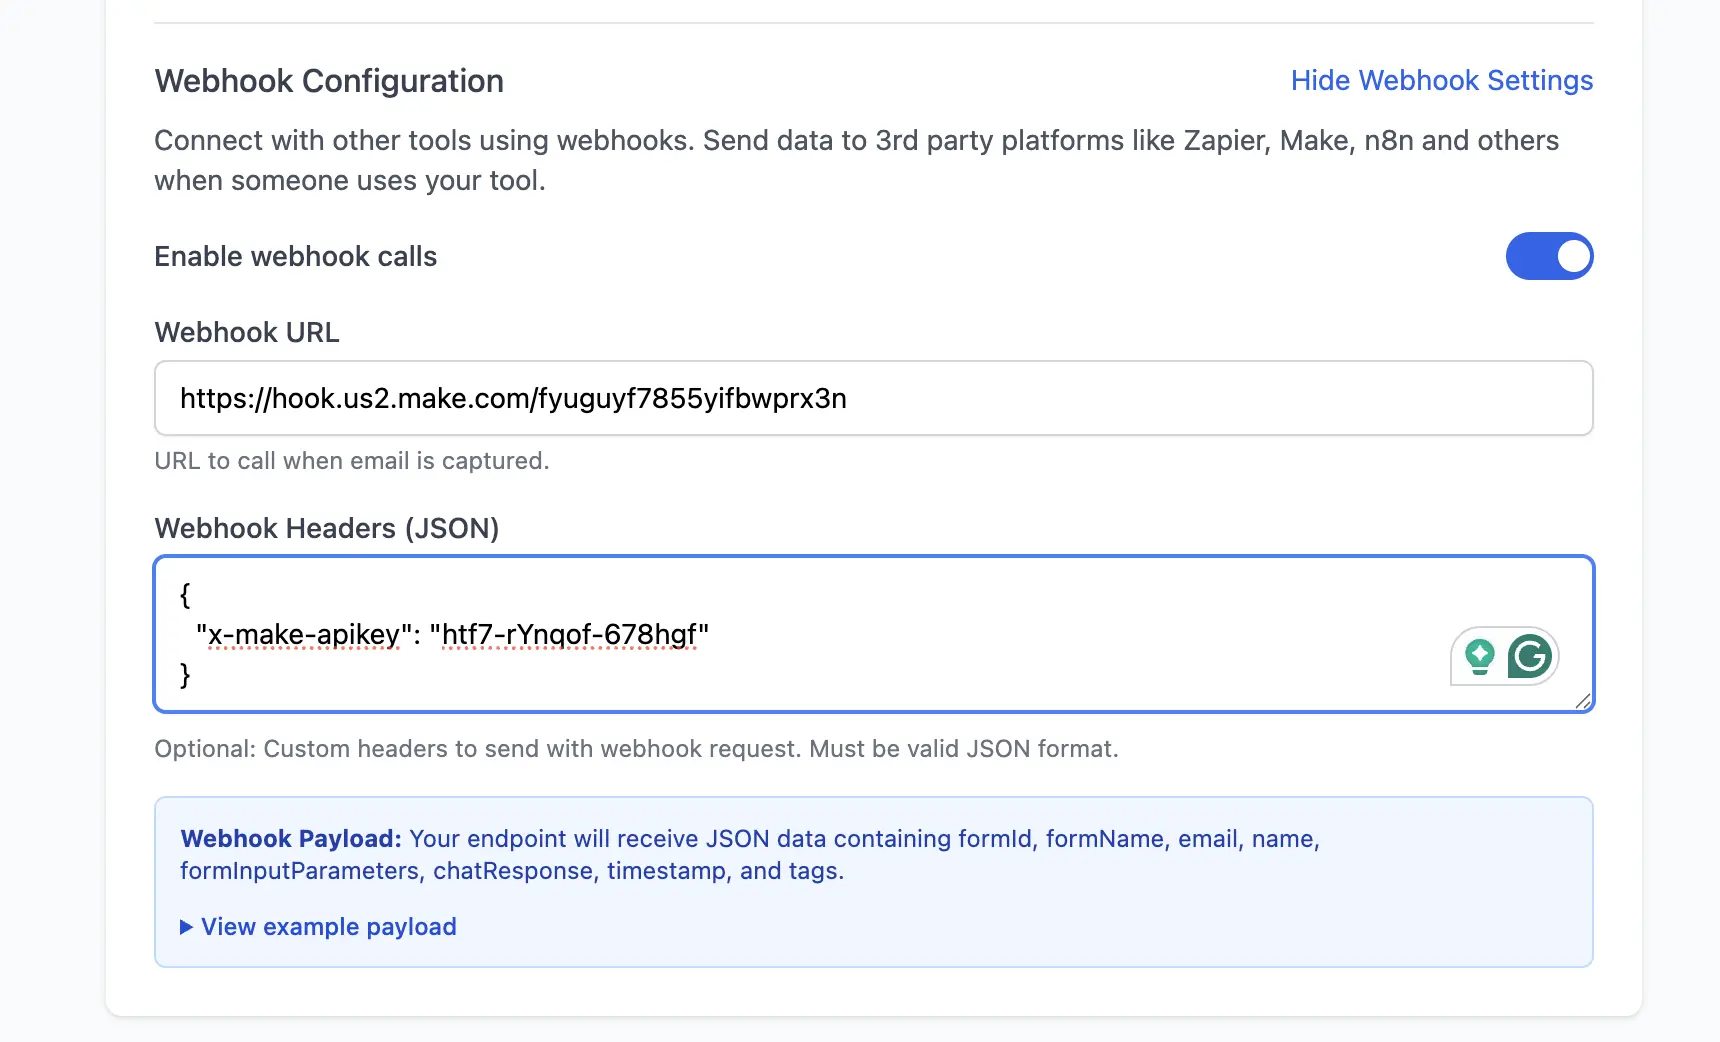
Scroll to the Webhook Configuration panel.
- Enable Webhook Calls
- Paste the Webhook URL from Make.com
- (Optional but recommended) Add a JSON header with your Make API key:
{ "x-make-apikey": "your-api-key-goes-here" }
3. What Data Is Sent
When a user submits your form, Promptomatic sends the following fields in the webhook request:
formIdformNameemailnameformInputParameters(e.g. vibe, style, environment)chatResponse(AI-generated output)timestamptags[]
You can preview this structure by clicking View example payload in the interface.
4. Frontend Example
Here’s what the user sees after completing the form:
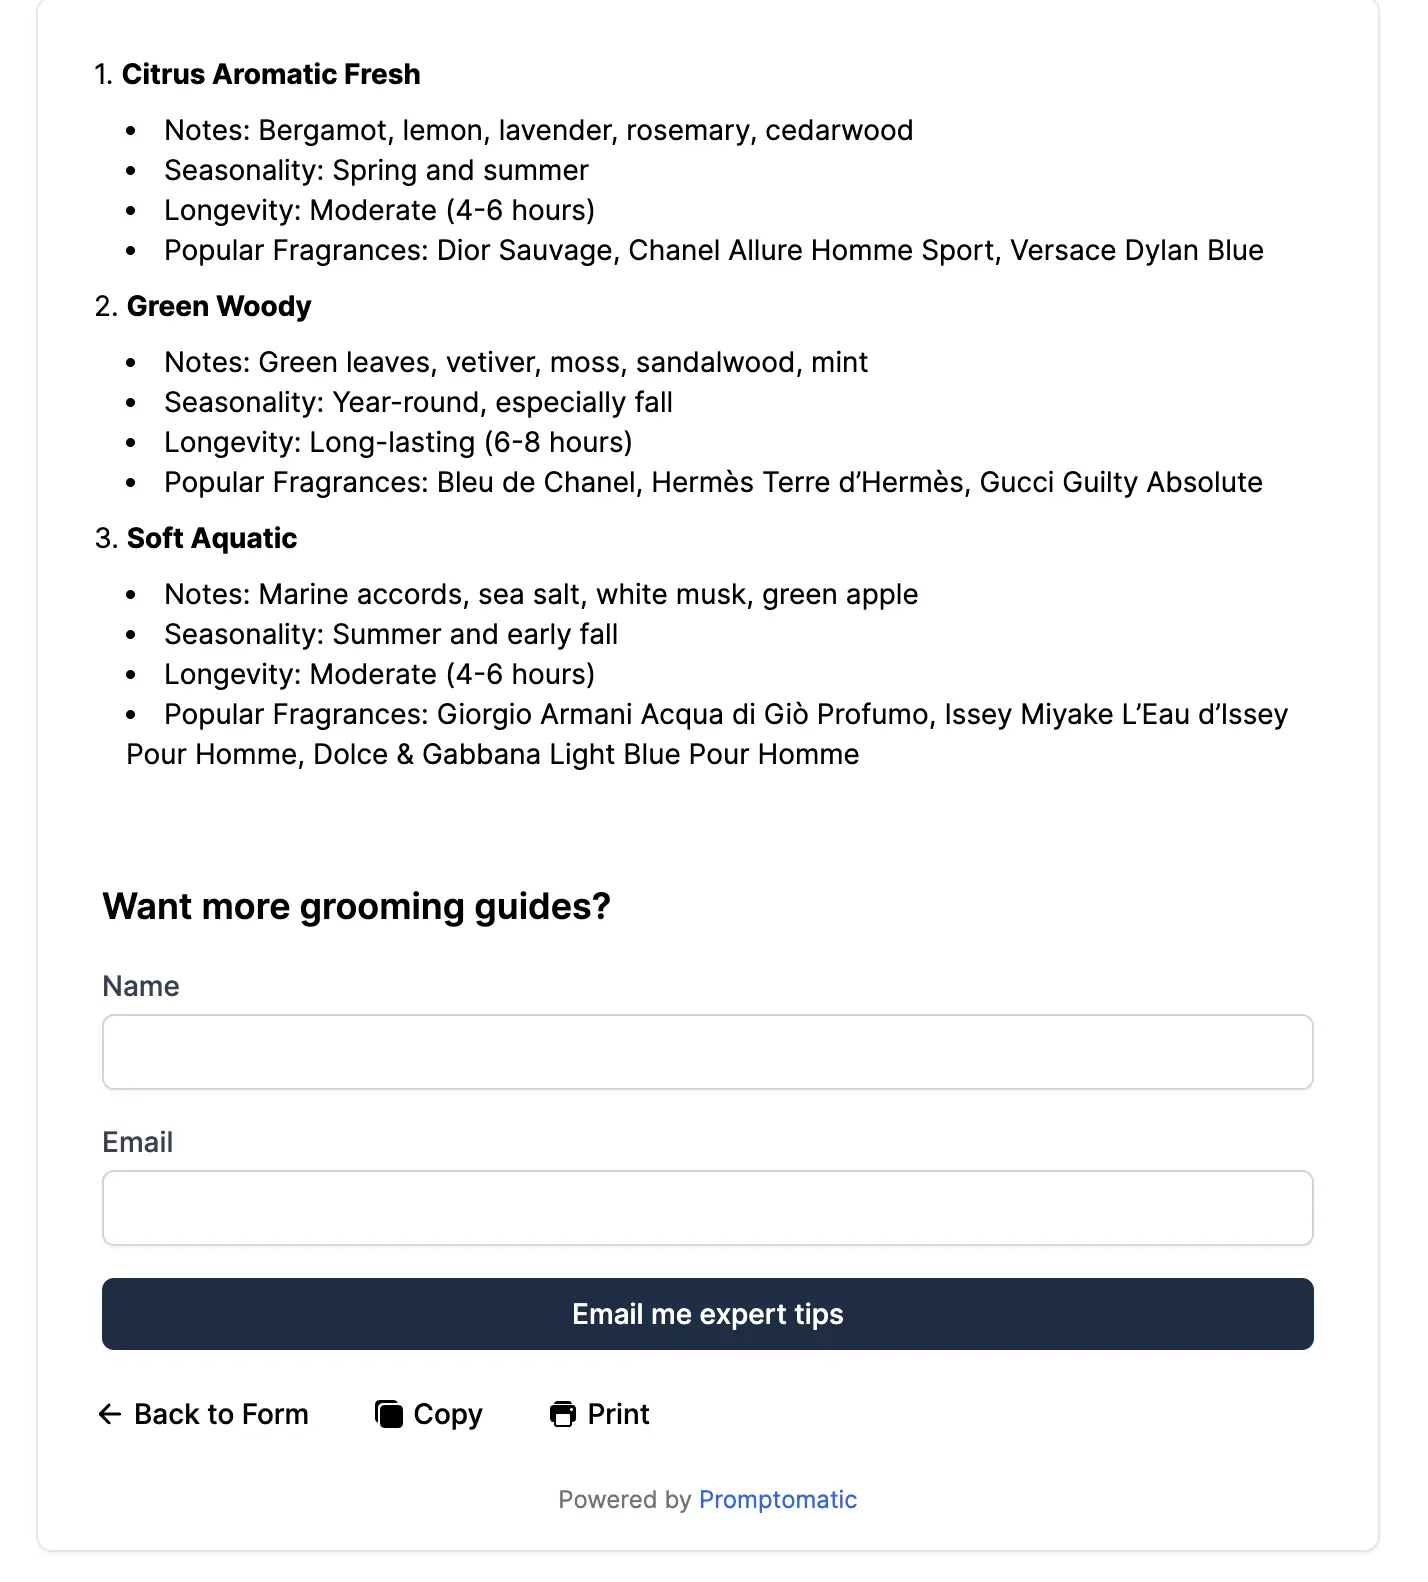
Once they fill in their Name and Email, the webhook is triggered automatically, and the automation (e.g. email, database update) begins.
✅ You’re All Set!
You’ve now fully connected your Promptomatic AI form to Make.com using a secure webhook.
You can now:
- Send personalized emails based on AI responses
- Push data to Google Sheets, Airtable, or your CRM
- Trigger any custom workflow in Make
Need help? Contact our support
